As of June of 2011, AEthelmearc's fencing policies will be changing over to Heavy Rapier default. Some have been concerned about this change with two reasons standing at the forefront: weight of gear and cost of gear. The information in this paper will attempt to address those concerns.
For the purists reading this page who will balk at the thought of an oval schlager due to it being "totally inappropriate to our game," my response is the request to either bear with me for the better aspects of this exercise or to find another page to read. The objective here to facilitate allowing those who have thus far only owned Light Rapier (foil/epee) gear and attempt to aid them in participating with the larger community that is fighting with Heavy Rapier, enabling them to step directly into fencing with Heavy Rapier with as little change in their gear as possible. Should they find themselves catching the bug and wishing to invest more, far better rapier simulators can then be pursued. This information is an aid to transition from foil/epee to a slightly heavier blade. It is also put forward to be of assistance to groups who are finding themselves needing to convert Light Rapier loaner gear for use with Heavy Rapier.
The argument has been put forth that Heavy Rapier is too heavy for those with weaker hands/arms. This is an argument without substance. Yes, there are possible injuries that prevent us from utilizing heavier gear, but in most cases, it is not the weight of the gear but is instead the balance that affect the use. Even more to the point is that appropriate use of the blade in question counters physical limitations. The extremely light sport blades make sloppy technique easy and forgiving as compared to a heavier blade that requires more deliberate method for execution. However, those with this argument will be unconvinced until these ideas are realized through experience; therefore, we must dispell the idea of how terribly heavy a Heavy Rapier is.
In a comparison of 35 inch length blades, we have the following weights and prices of bare blades:
Bare Practice Foil Blade: 5.5 ounces, $26.50 (ZWA Practice Foil Extra Strong)As can be seen, there is not much difference in the weight between an epee blade and an oval schlager blade.
Bare Practice Epee Blade: 7 ounces, $40 (ZWA Practice Epee Extra Strong)
Bare Oval Schlager Blade: 10.5 ounces, $58 (Hanwei Oval Schlager at By The Sword, Inc), $55 through Matheus of the Midrealm (thompsonimports AT hotmail DOT com)
For those finding a Heavy Rapier to be too heavy, the real question is "how is it heavy." In most cases, this is a result of the blade being tip heavy, forcing the fencer to compensate with greater hand and forearm strength to direct the tip as desired. While there is the argument from those favoring tip heavy blades for utilization in arcing blade motion, this is not a universally favored balance. To facilitate reduced fatigue and to provide great ease of use for those with injury or developing hand strength, the most promising point of balance of the blade with be at the guard. This reduces strain on the grip, hand, wrist, forearm, elbow, shoulders, and back, thereby eliminating the concern of weight. When one is utilizing a 10.5 ounce oval schlager blade, the amount of counter balance created by the guard, grip, and pommel would need to be approximately 10 ounces. In total, this would be a 20.5 ounce weapon, which is 1.25 pounds. Is this weight truly too heavy to wield? No.
Conversion of equipment to an oval schlager blade can be very simplistic. When ordering the schlager blade, there is the possibility with some suppliers (such as Zen Warrior Armory, who notably only sells diamond schlager blades) to request that the blade have a square tang. If the blade is purchased with a square tang, it will be ready for easy insertion into the guard and grip of any foil or epee with little or no modification; however, one should be prepared that the blade will be tip heavy as a result. This is due to the fact that sport guards and pommels are designed to be exceedingly light (combined weight of guard, grip, and pommel typically would weigh 5 ounces). The use of a 10 ounce pommel should effectively create a blade with a balance point at the guard. The only possible need of modification would be the length of the tang, which may be longer than the guard and grip to allow for a snug fit of the pommel. If this is the case, a small amount of the threading would need to be cut off with a hacksaw.
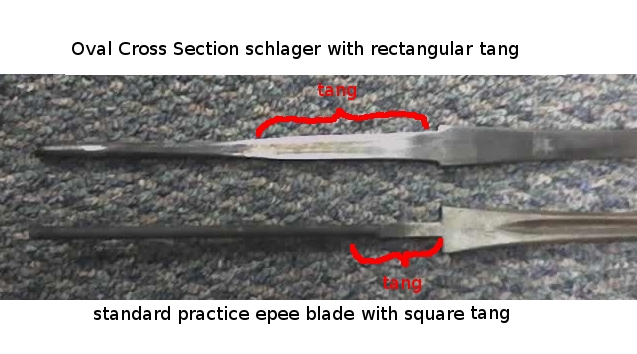
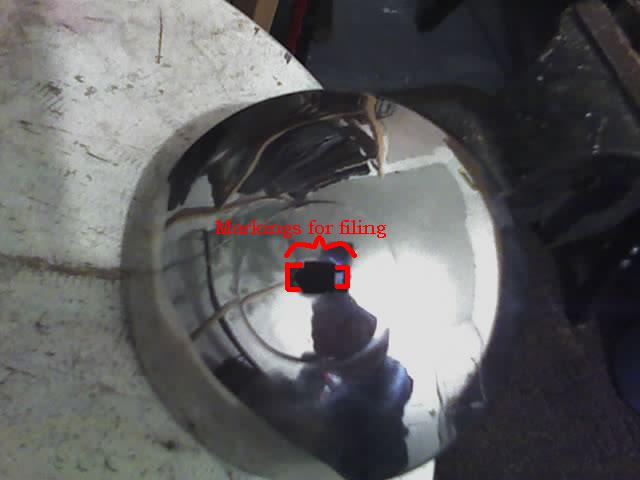
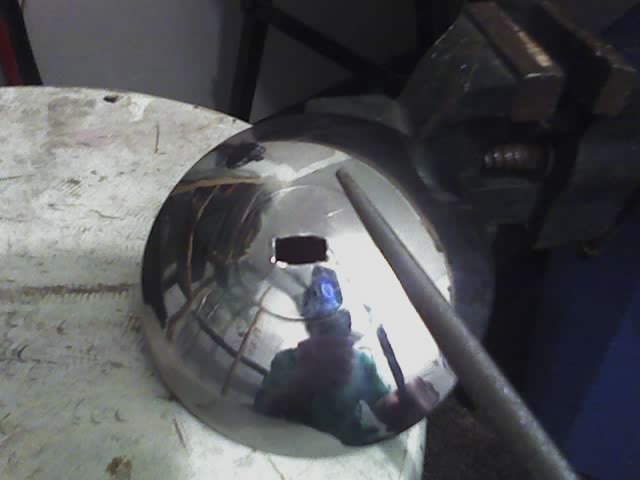
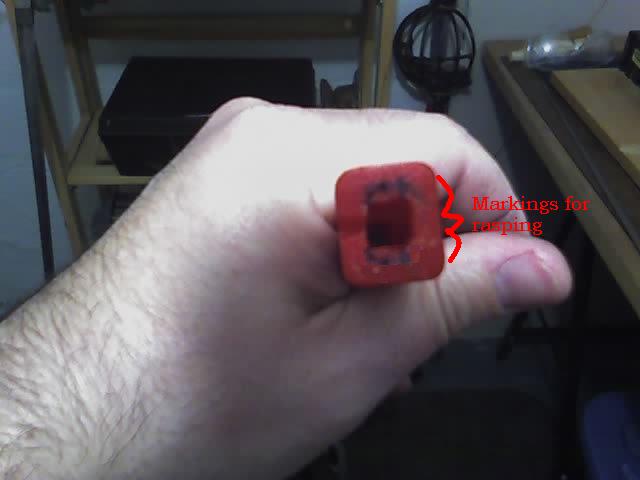
On the basis of blade strength, my personal recommendation is to obtain a schlager blade with a rectangular tang. Should you choose this option or be unable to obtain a schlager with a square tang, some adjustments will need to be made to accommodate your gear to the blade. The first option available is to file the rectangular tang to square dimensions yourself. The other option is to modify the guard and grip to accommodate a rectangular tang. The hole in the guard of a foil or epee bell is obviously square to match the blade that it has been housing. Measure the dimensions of the rectangular schlager tang, and mark the guard appropriately for how you will file the opening to rectangular shape.
Similarly, if the grip also has a small square opening suited to a modern epee or foil, this will also need to be widened to accept a rectangular tang. Measure the dimensions of the rectangular tang, and mark your grip. Most modern grips are constructed of synethetic material. This can be easily increased in size using a small dimension wood rasp. Be patient as the rectangular tang is longer than you can see. Rasp and fit repeatedly until things match.
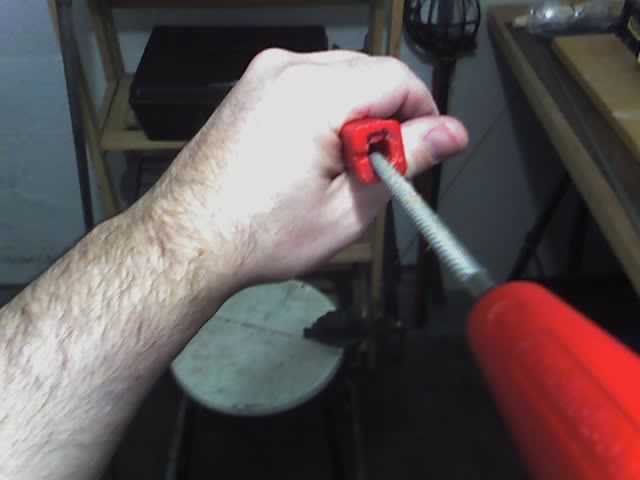

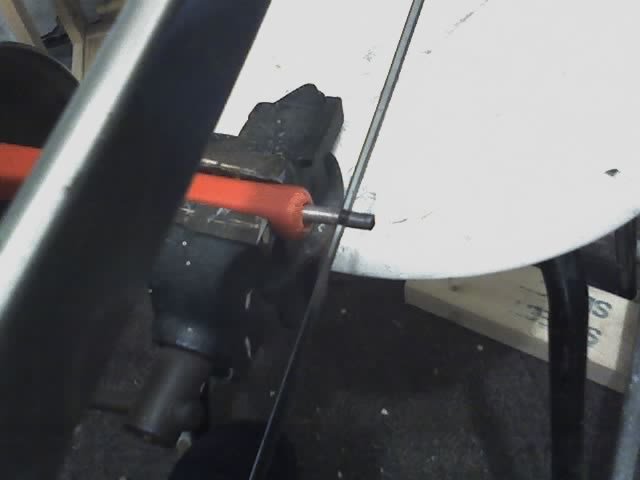
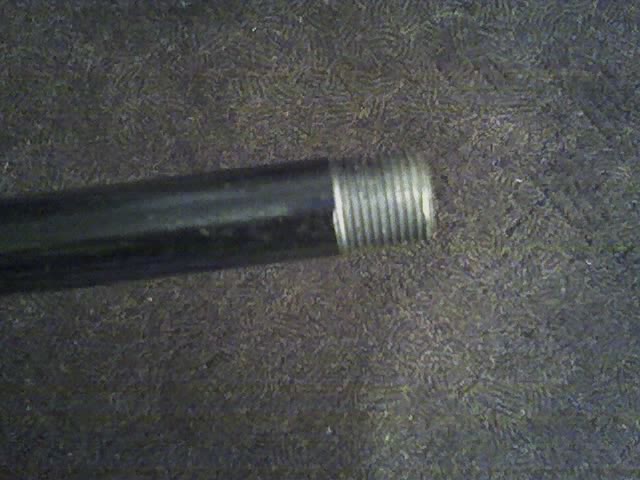
Once the grip has a good fit, place the guard and grip on the blade. There is a good likelihood that the blade will have excess threading that will prevent you from placing tightening the pommel appropriately. You may deal with this by either using a spacer (such as multiple washers) or by cutting the excess threading with a hacksaw.
With the appropriate fit, assemble the blade.
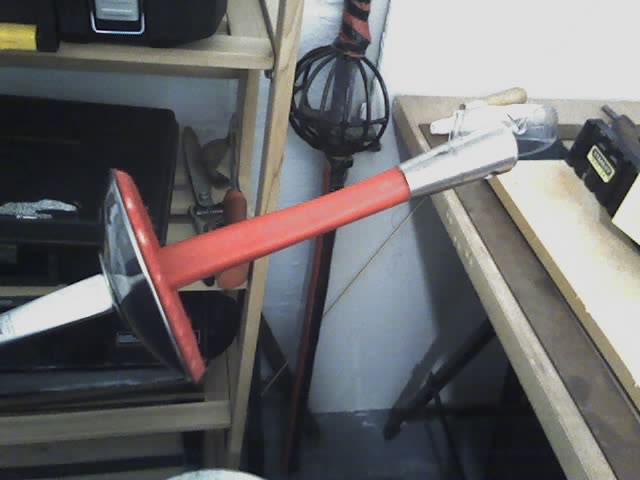
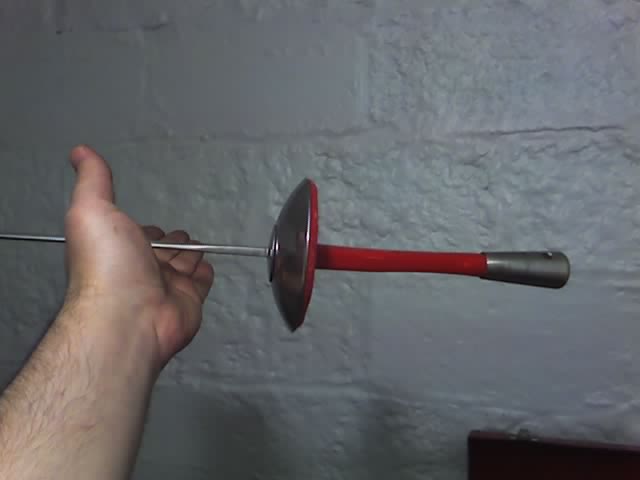
The combination of a small foil guard, French grip, and 7 oz. epee pommel will not weight the schlager blade at the guard. This will result in a tip heavy blade, an arrangement that many will misidentify as being "too heavy." Application of an 8 oz round pommel moves the balance closer to the guard; however, to achieve balance at the guard will require a pommel weighing approximately 10 oz. A blade balance at the guard will be a blade that feels very light, and the difference between an epee and a schlager will be negligible.
Edit: A low cost possibility for improving the weight and balance is the use of a center drilled piece of 1.5 inch diameter steel rod approximately 1 inch in length mounted just before the epee pommel. This would require cutting off a portion of the French grip to accommodate the extra steel but would grant a better balance. I will post definitives on this idea once I test it.
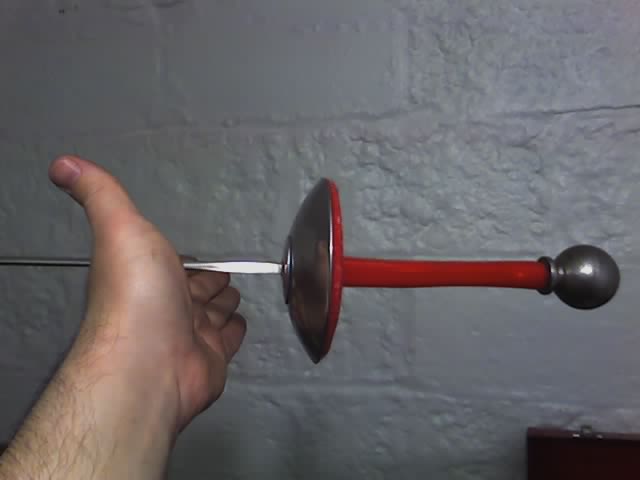
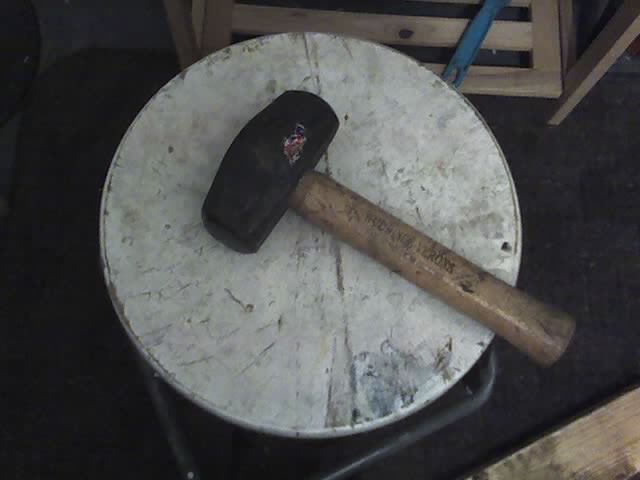
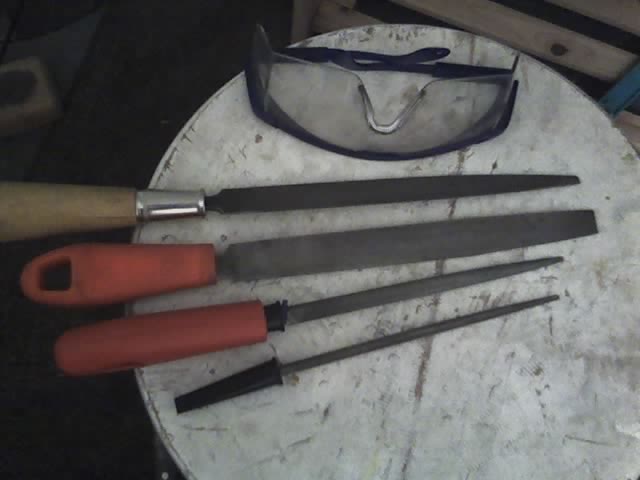
The addition of a little more work can bring the balance point back further and provide a more accessible blade. With the use of some steel rod, steel or brass pipe, a drill, and files, you can fashion a simplistic set of quillons with false ricasso. The addition of a tungsten carbide grit cord in a hacksaw blade will speed up this process. I made use of the mallet from my camping kit and files that I had purchased cheaply at a local flea market.
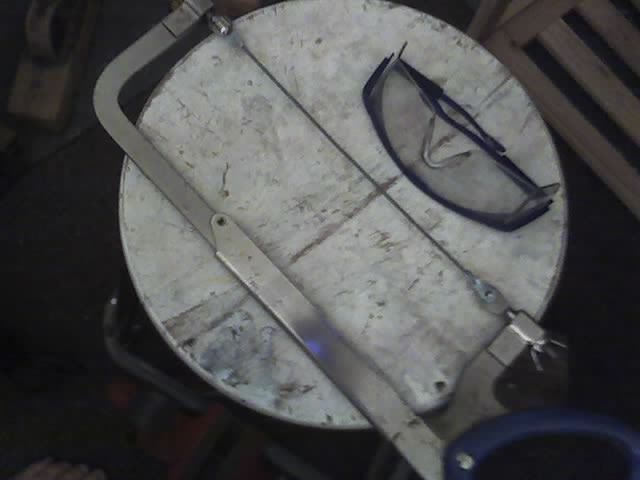
Holding the pipe with some large pliers and wearing safety goggles, hammer the end of the pipe to an oblong shape. Test this for a snug fit on the tang of the blade by insert the end into the pipe. Remove the blade. Cut off the threaded portion of the pipe and then remove the last 2 inches of flattened pipe. File the ends to remove burs and sharp edges.

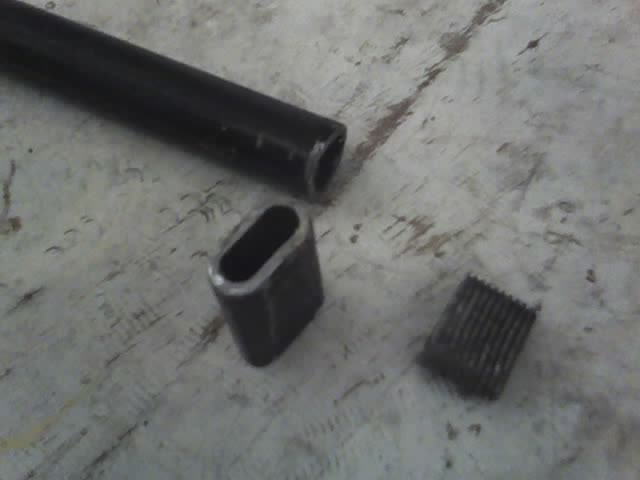
This will then sit nicely against the foil guard.
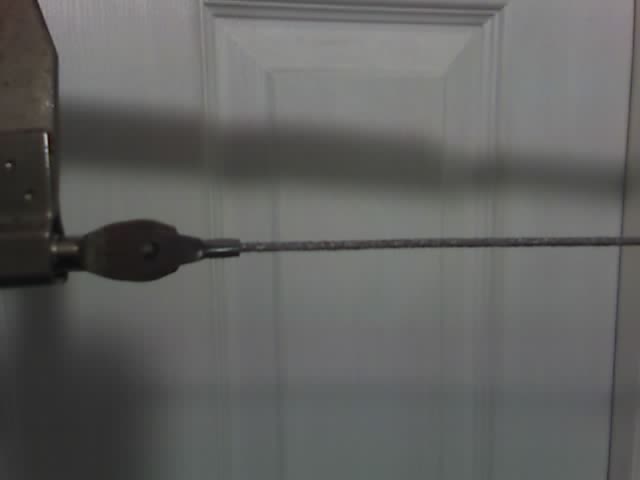
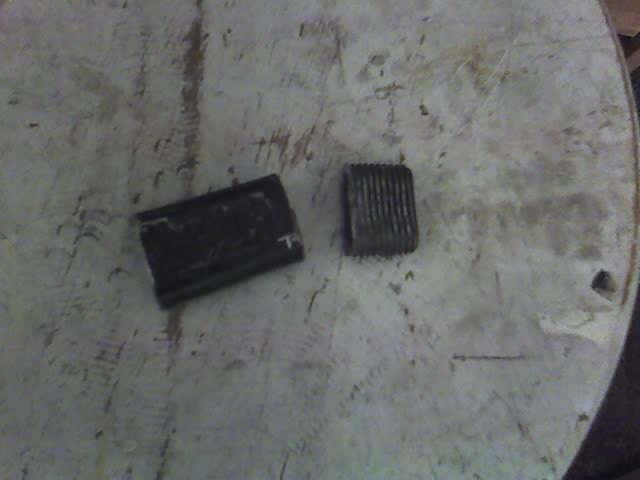
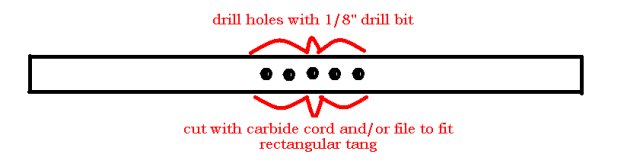
I made use of some steel rod that I purchased for $5 at Lowes and cut off an 8 inch section of this. File the ends smooth. Find the center of the steel rod and mark this. Measure the width of the tang and mark this at the center of the steel rod. Drill approximately five pilot holes with an 1/8 inch drill bit starting at the center and placing two more on each side to the dimensions of the rectangular tang. As you are drilling through steel, go slowly to reduce the heat and protect your drill bit. Apply oil (such as 3-in-1 oil) to lubricate the drill bit and cut down on the friction that will dull it. Do not apply too much pressure, or you will risk breaking your drill bit. Change out your 1/8 inch drill bit for a 13/64 inch drill bit. Redrill the center hole and at least one more to create a large enough opening enable you to fit the tungsten carbide cord through the steel rod. Attach the cord to the hacksaw. You may need to use your files to allow this to fit. With the rod anchored firmly in a vice, cut the line from the first hole to the last. Use both the tungsten carbide cord and the files to widen this space to fit the tang snugly at the point where it meets the false ricasso. File smooth any sharp edges.

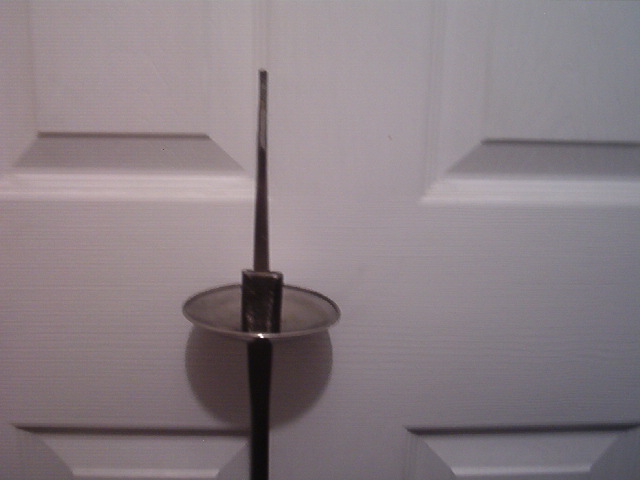
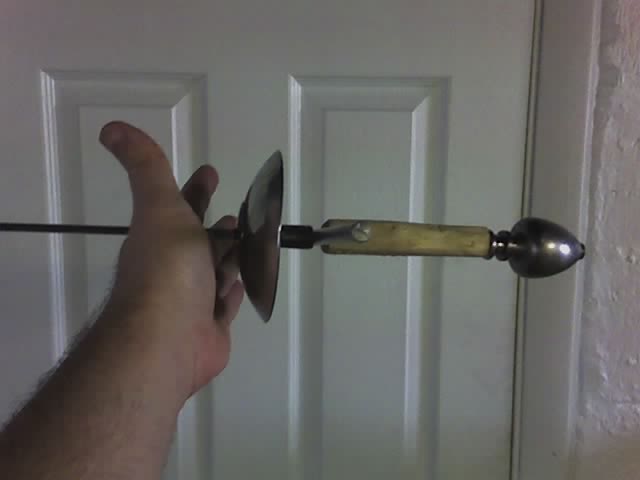
Place the new quillon on the tang against the false ricasso piece. Place on the grip. You may use the modified French grip but will have to shorten it accordingly to fit with the other pieces. (I made use of a homemade grip fashioned out of a piece of furring strip.)


Attach the pommel and check your balance point. (I added a 9 ounce pommel from Darkwood Armory, all of which brought the balance within 1 inch of the guard.)
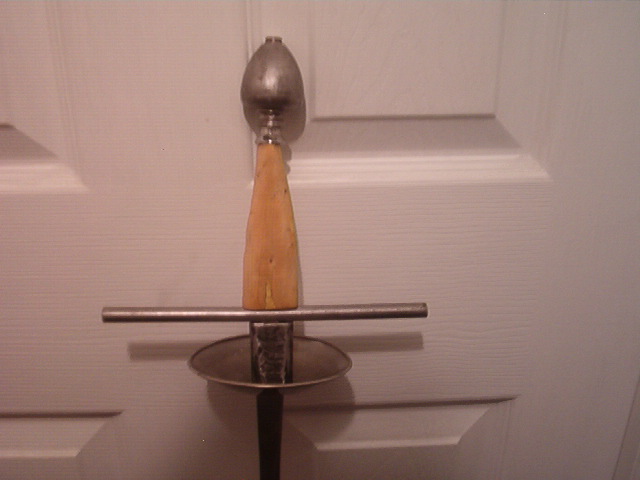
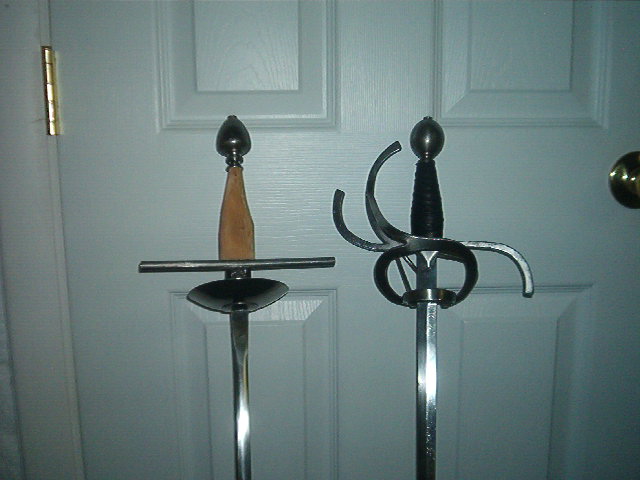
If your assessment is that this guard configuration is not an attractive piece, you have my agreement; however, a sport epee is not an attractive blade either. It is simple and to the point of function. The goal here is to assist in transitioning to Heavy Rapier at a low cost, and you get only that for which you pay. Should an attractive blade (such as that on the right, crafted by Darkwood Armory) be desired, go for it, and welcome to the party; however, it will be much more expensive. I look forward to the day when you want more than a toy to let you join in and instead want a sword.
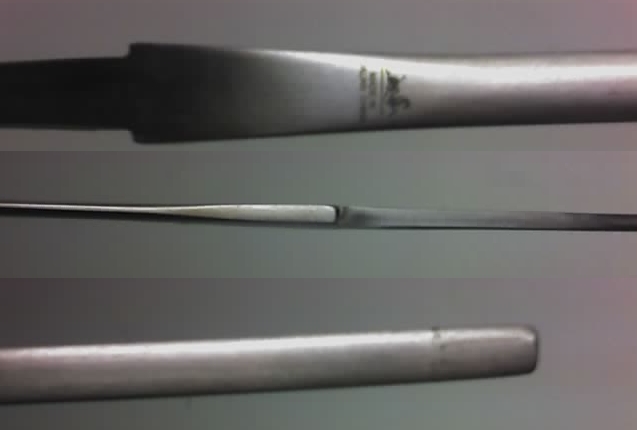
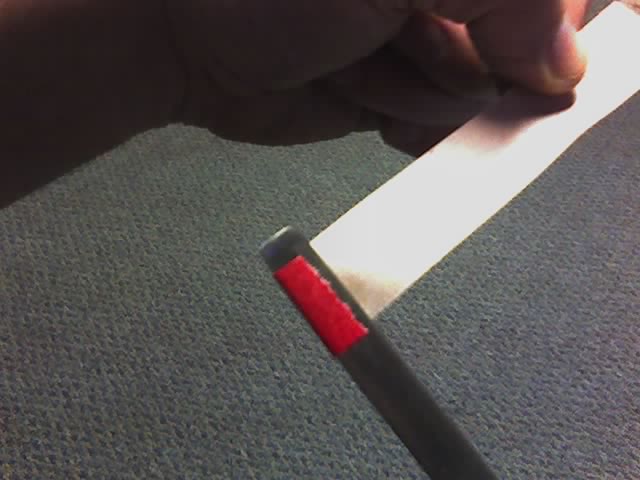
With your blade assembled, you will now need to add a bird blunt to the tip. Tipping a heavy rapier is different from that to which you were accustomed with practice epees and foils. With a few exceptions, you will not be finding a nail head tip. As a result, we need to take extra measures with the bird blunt by inserting a washer into the bird blunt to rest flat at the tip.
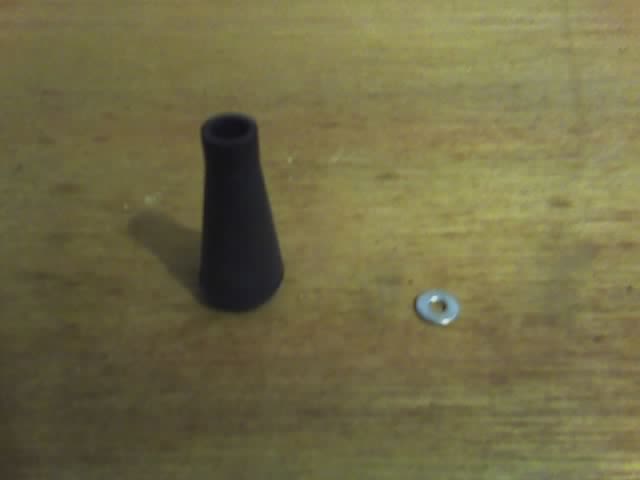
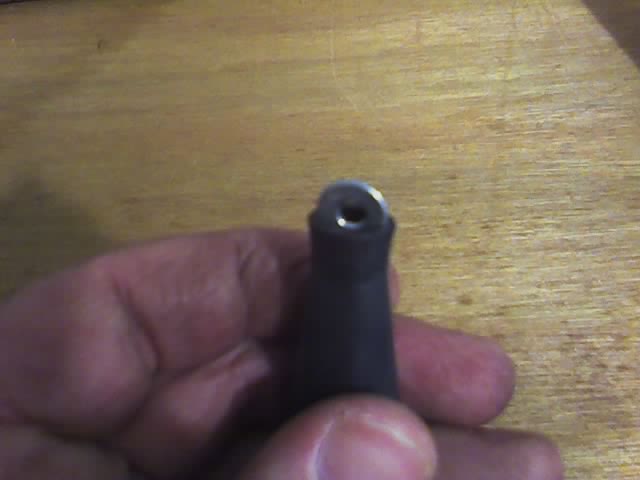
After placing the washer into the end of the bird blunt, you will need to force it to the tip with a screw driver. Once it is at the tip, it is essential to manipulate it until it is firmly flat at the tip.
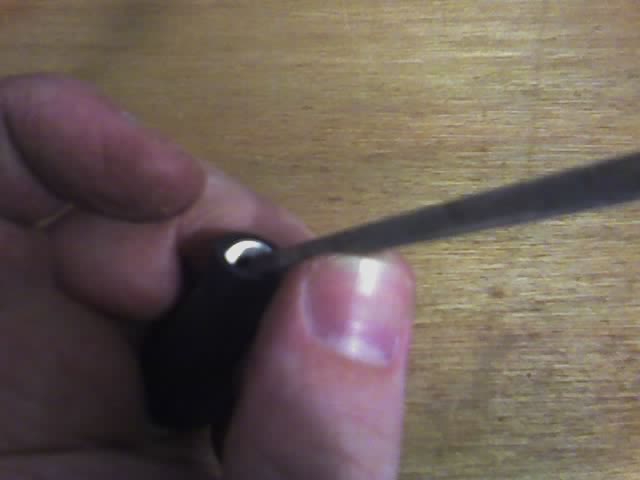
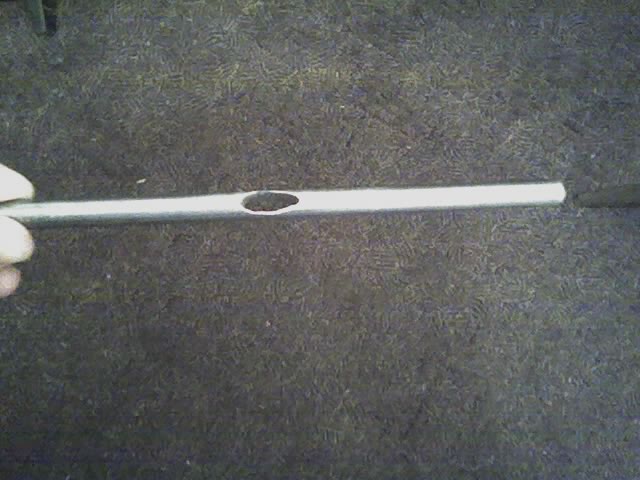
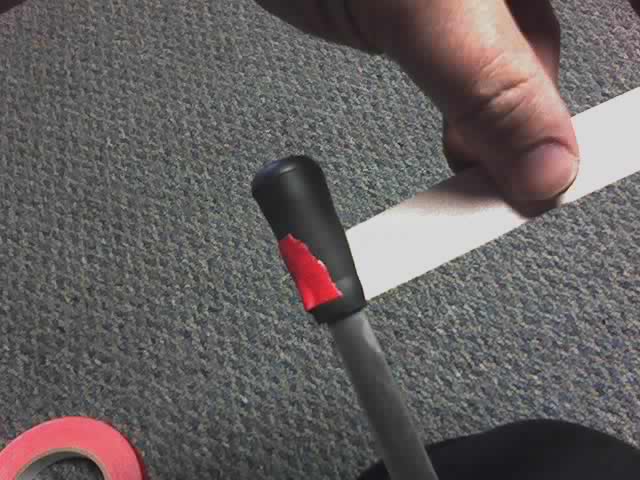
Examine the tip of the blade. It needs to be completely flat. If it came with a rounded tip, you will need to patiently file this to make it flat. Do not use a grinding stone as this will heat the blade and can damage the temper. With a flat blade tip, wrap a few inches of tip tape around the tip of the blade. This will act as a point of friction and help hold the tip securely once it is placed on the blade.
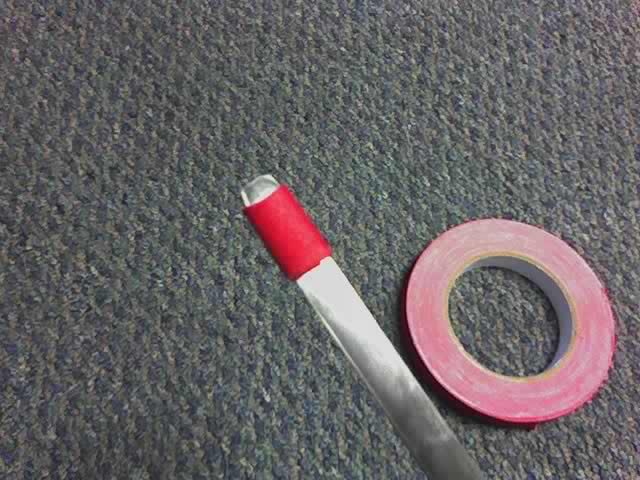
Work the tip over the tape, and the tape will be hidden within. At this point, you will find that it will require diligence to remove the tip from the blade, assuring you that the goal of securing the tip has been accomplished.
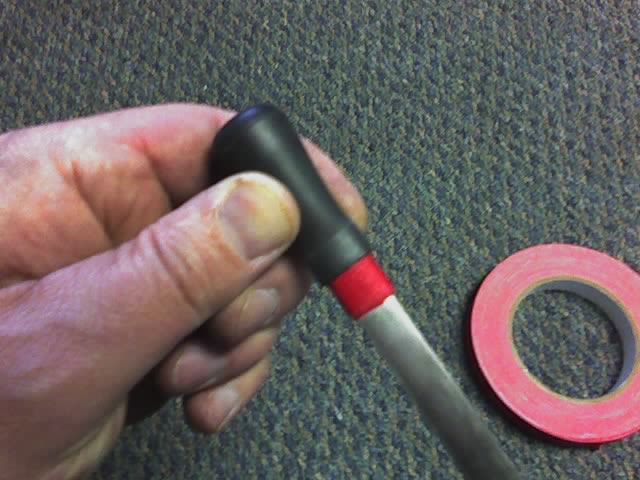
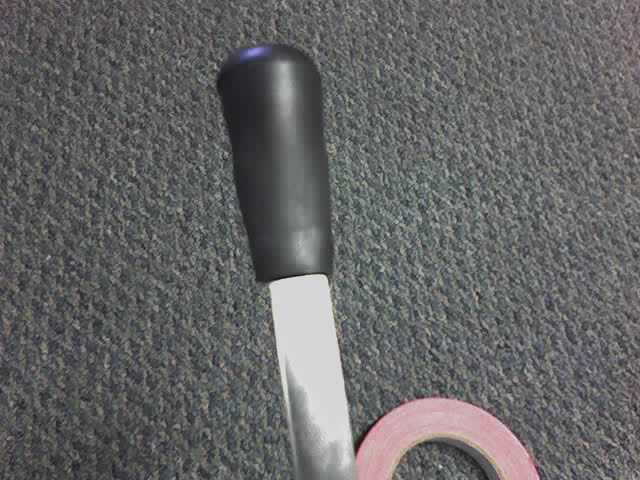
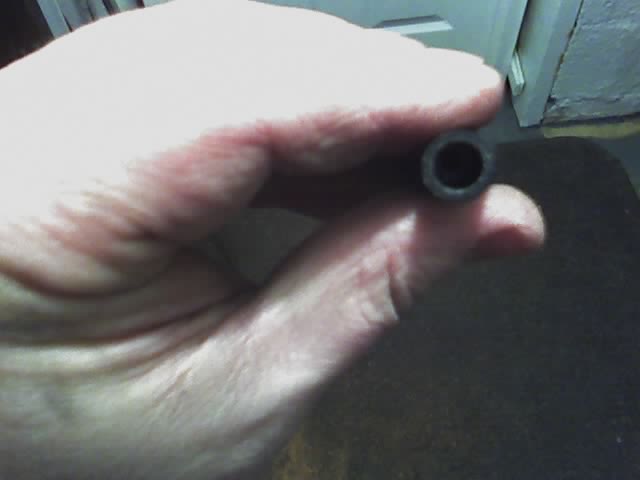
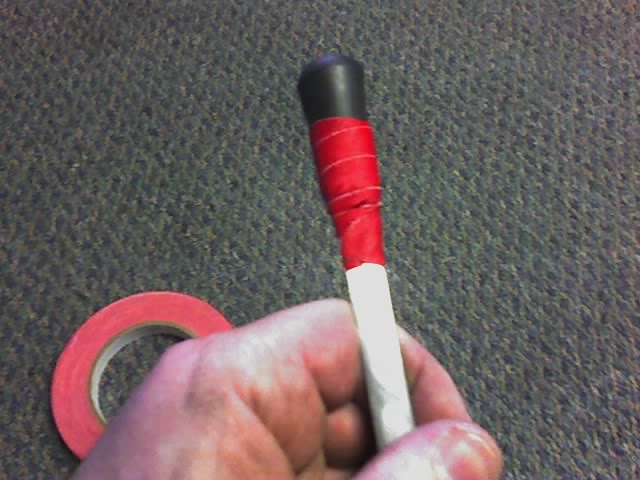
Next, wrap brightly contrasting tape around the bird blunt and the distal portion of the blade to further secure the blunt and to give the marshals a clear visual indicator that your blade tip is securely in place during combat.
Welcome to fighting Heavy Rapier. Here is hoping that you will not be able to resist blade nuances that you will experience with a stouter blade and will before long be saving your pennies to purchase a much more attractive combat tool.
